Introduction to Layer Files
A Layer File contains a shapefile and symbolic information. A shapefile is a vector representation. The symbolic information includes, colors, labeling information, range of appearance, classification breaks, and other information that is generated in the creation of a map and generally saved in a project file (MXD). When a shape file is brought into a map, symbolic properties must be set again, in a layer file they automatically appear. Note: it may be helpful but not required that the lesson about Symbology be completed before this lesson.
A layer file is a pointer to a shapefile or a georeferenced image. The layer file will contain information to properly display data of the shapefile or image. Layer file creation is accomplished through using ArcCatalog. To begin start ArcCatalog from inside ArcMap or from the stand alone ArcCatalog Application. In this example the application was used. If the Icon is not located on the desktop, a search will need to be made.
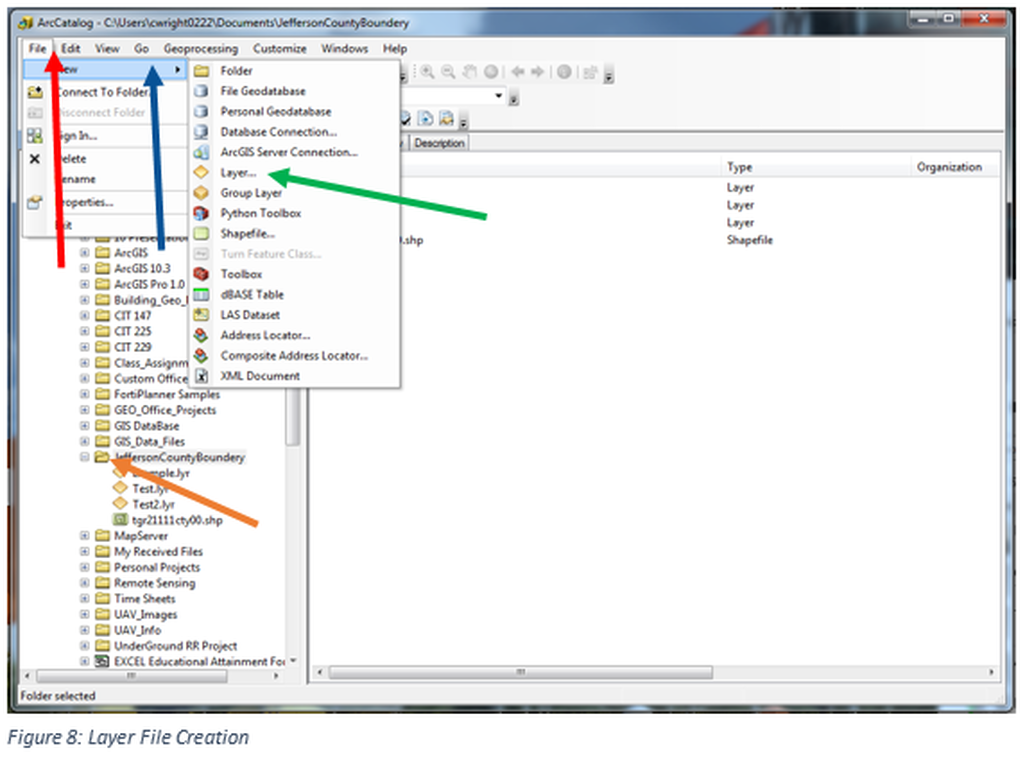
Highlight the folder where the new layer file will be placed. For this example the “Jefferson County Boundary” folder was selected. Next click on the File tab, under the File menu click on New, and then select Layer, see figure 8.
Highlight the folder where the new layer file will be placed. For this example the “Jefferson County Boundary” folder was selected. Next click on the File tab, under the File menu click on New, and then select Layer, see figure 8.
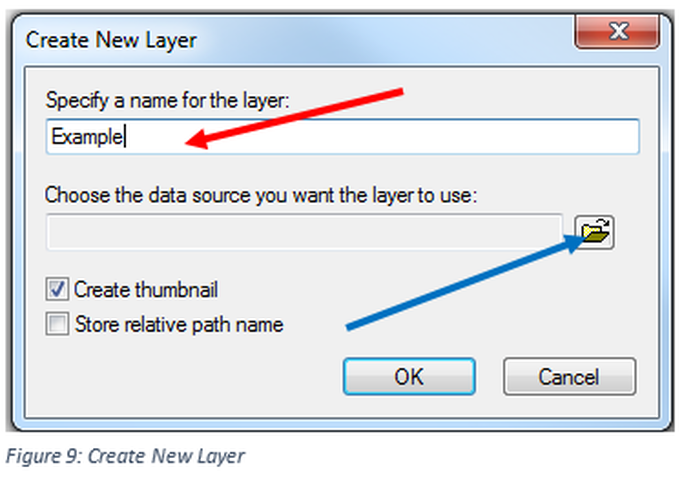
After selecting Layer, the Create New Layer window appears, as in Figure 9. At this point give the layer a name, for this lesson the name “Example” was chosen. Next a shapefile must be selected to include in the layer. Use the Browser Button to select the shapefile to be used. In this example the “Jefferson County Boundary” shapefile was selected.
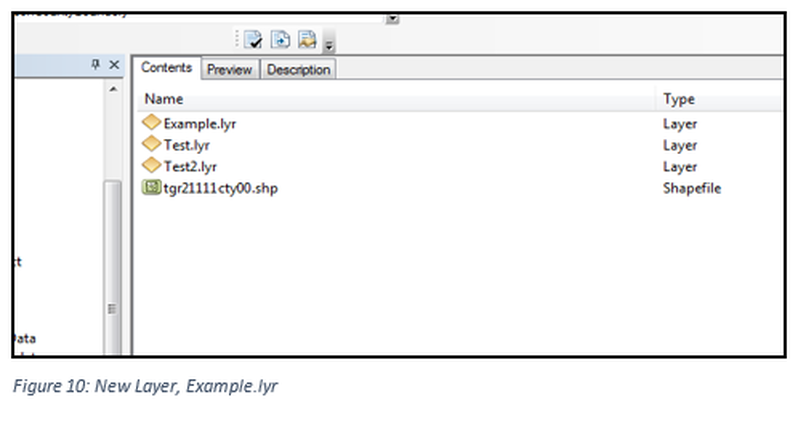
Notice the Example file that was created, has the extension lyr, the icon is a yellow diamond compared to a shape file which is a green square, see Figure 10.
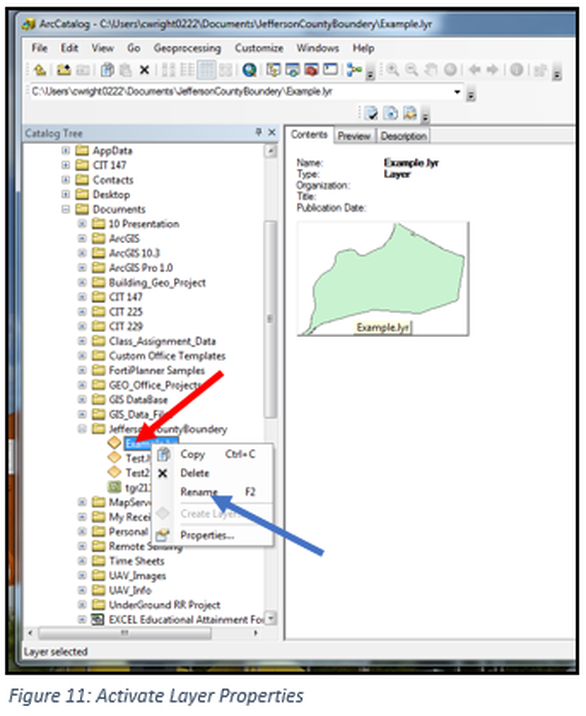
Select the layer file “Example” in the Catalog Tree and Right Click on it. Then select Properties, see Figure 11.
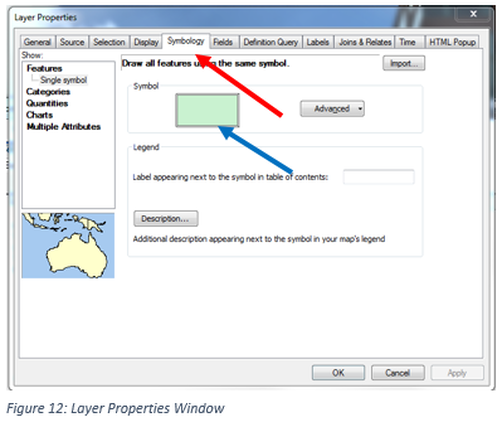
The Layer Properties window is very similar to the Properties Window used in ArcMap. Note: in Figure 12 the shapefile is a shade of green. Land masses are normally depicted in light yellow. To make the shapefile the appropriate color select the Symbology tab. Then choose Symbol.

The desired color, for this layer it is Esri Yellow. The Fill Color Tab can be used to see more choices. After the choice has been made, choose select , see Figure 13.
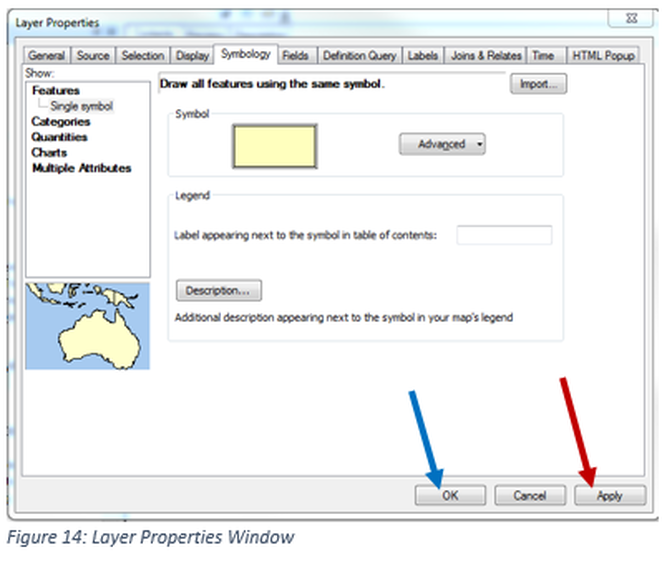
To complete the symbology change select Apply and then OK. This information change will be saved within the layer file, not the project file (mxd). Now when this layer file is used in a map it will automatically be yellow and not need to be set-up within each new map project file, see figure 14.
Layer Package Creation
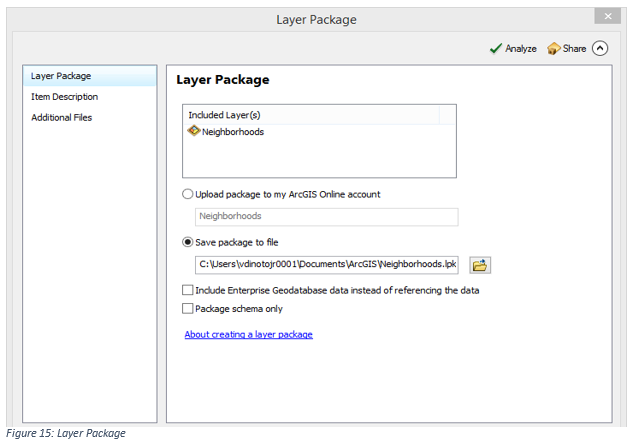
The creation of a layer file has the same issues as the creation of a project file, in which the data source can become disassociated with the symbology if the shapefile or image file is moved to a different location. As long as the layer file is not moved it will remain associated and can be used in multiple projects. A Layer Package can be created in a similar manner to the creation of a Map Package (see the creation of a map package in this lesson). The Layer Package will make the layer file transportable between computers and users. The creation of a Layer Package is accomplished in ArcMap, right click on the layer file in the table of contents and select create layer file. A new dialogue box will open. The Layer Package will make the layer file transportable between computers and users. The dialogue box has three items of control on the left side and two buttons on the top right corner. In Figure 15, the file(s) that are being included in the Layer Package are displayed.
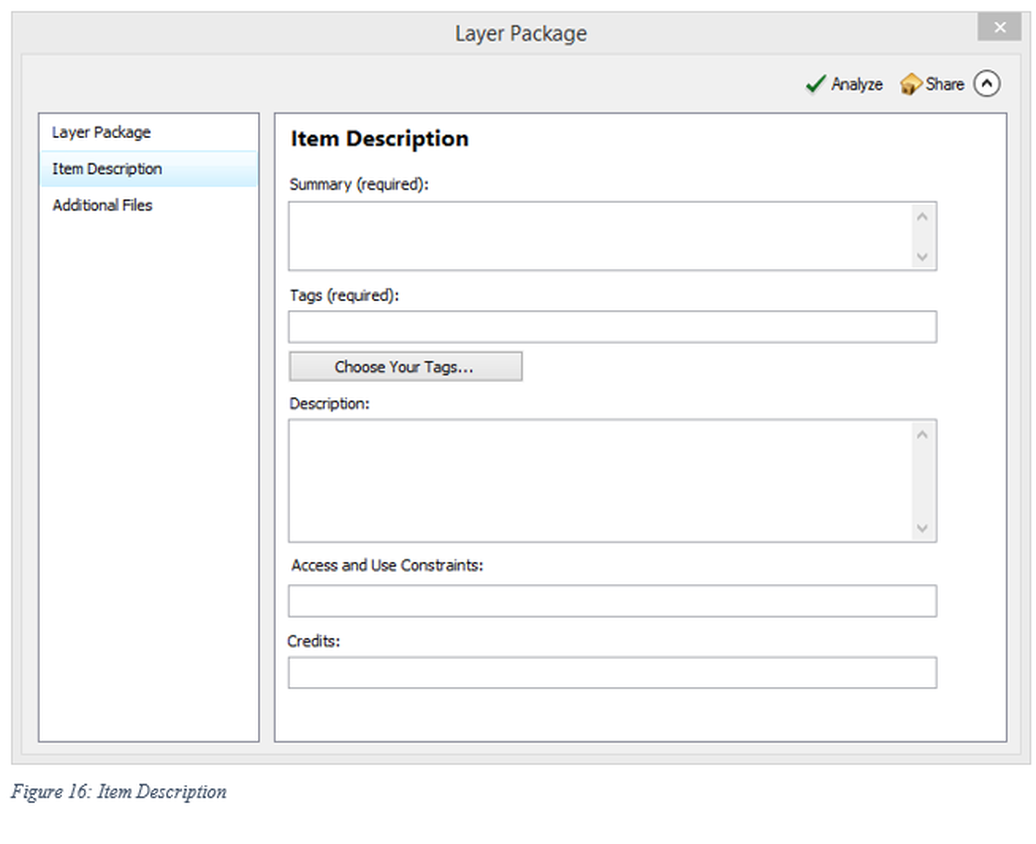
The next selection is determining a storage location, for this example it will be saved on a local drive. Select the item description, as shown in Figure 16. In the item description the user will provide metadata similar to what is created with any shapefile, existing metadata will be included, for the particular file that is being demonstrated and no metadata existed and will need to be added prior to saving the layer. In Figure 16 the required and optional fields are shown. A summary is a required field as is Tags, the other items are optional. The selection of tags is extremely important because it makes it easier to locate layers. The final selection is the Additional Files field, multiple layers can be contained within one layer package, for this example only one file will be in the package and thus this process will not be discussed. Once all the content has been added to the Layer Package creation windows, select Analyze to insure that the package can be properly constructed. A message bar will appear with errors and warnings. When the author attemptted this operation, an error was received because the description had been left blank. Once a description was included the error was corrected. Click on Share and a location will be requested. This created package can now be shared with colleagues.