Directional Arrow
Click on the Insert Menu to select the directional arrow (North Arrow) for the map. There are multiple styles and there is not wrong or right
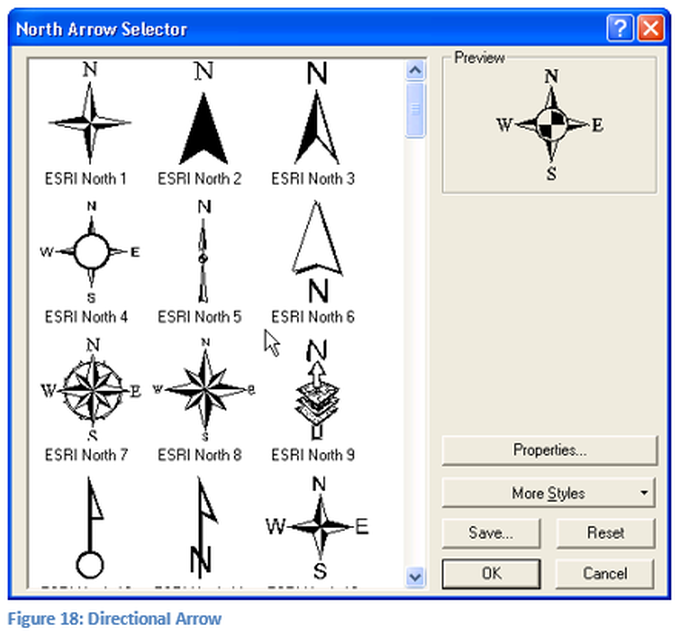
choice. Many organizations will select a type of directional arrow to be used on all maps. Once the directional arrow is selected it will be displayed in the center of the map. The designer will need to move the arrow to an open area of the map and size it appropriately. Generally the directional arrow is placed at the bottom or side of the map and not at the top. The color of the arrow can be modified by using the properties window. The arrow is resized by using the handles and a dialogue window. For this example the directional arrow will be placed on the right side of the map in an open area.
Scale Bar
Again open the insert menu and select the scale bar. A scale bar will now be added to the map. Scale bars are important to show the size represented by the map being displayed. The scale on the scale bar will dynamically adjust as zoom levels are changed on the map. If the map does not have a projection an appropriate scale bar cannot be placed onto the map.
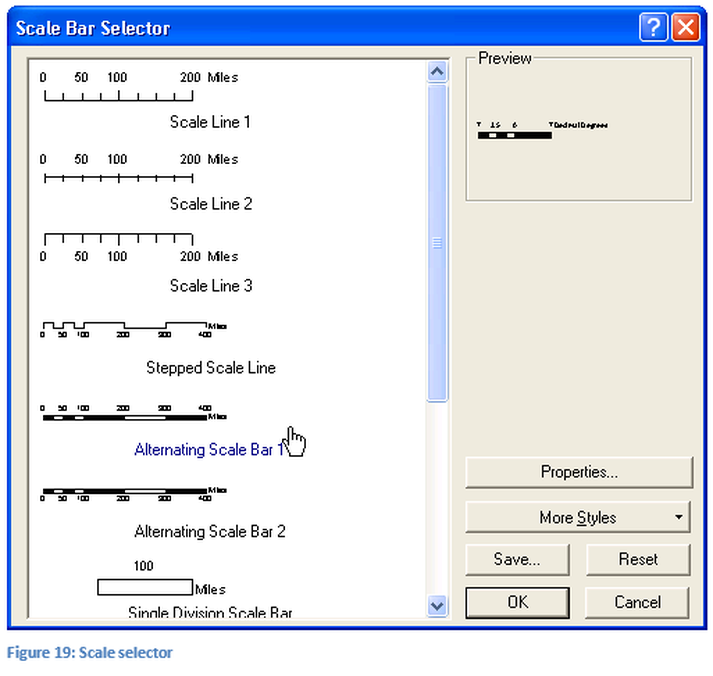
There are lots of choices in the Scale Bar Selector, select one that is appropriate for the map. Remember some organizations will predefine the look of the scale bar on maps. The properties of the scale bar can also be change by pressing the Property button. Click on the type of scale bar to include on the map, click OK. The scale bar, in general, will initially be placed at
There are lots of choices in the Scale Bar Selector, select one that is appropriate for the map. Remember some organizations will predefine the look of the scale bar on maps. The properties of the scale bar can also be change by pressing the Property button. Click on the type of scale bar to include on the map, click OK. The scale bar, in general, will initially be placed at
the center of the map, drag the scale bar to an open location near the bottom of the map. The Scale Bar can be stretched to create the proper length and size using the handle tools. The default units of the scale bar are in degrees, by double clicking on the scale bar a properties window will open which will allow the units to be modified. Units are generally not in degrees, nor would the use of feet or meters be appropriate for a large area
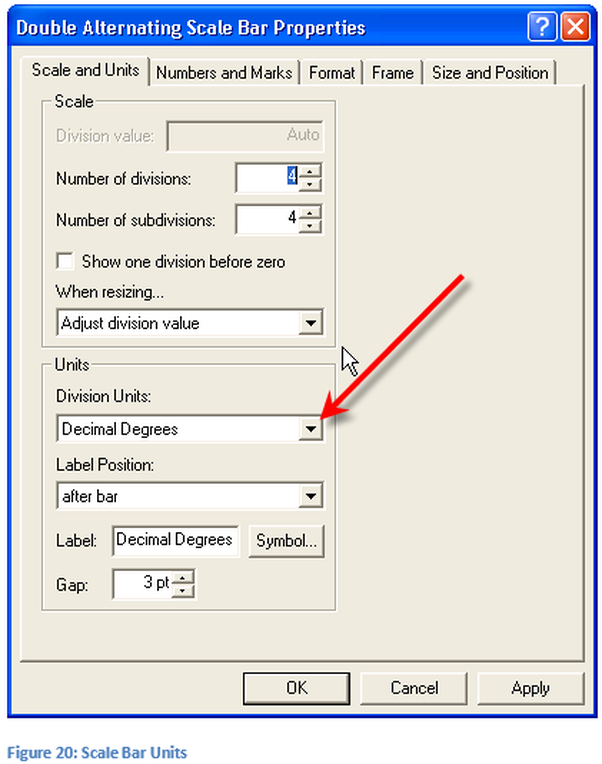
The Scale Bar Property window seen in Figure 20, the red arrow shows how to select different units. Click the pull down arrow to select the units of miles for this map. Other properties of the scale bar can be modified in the properties window. For this lesson only the units will be changed, click OK to complete the operation.
Text
The last requirement for the map is a text box that will contain information about those who created the map, the organization they are associated with, as well as the date of the creation. To open the text function click on the insert menu and select a text box. The text will initially be placed near the center of the map. Double click to edit and then move the text to the proper location. This is a very small box initially on the map, type the first line of information prior to moving it to a blank area of the map. It is recommended that this box be placed in the lower right corner, but organization specifications should be followed.
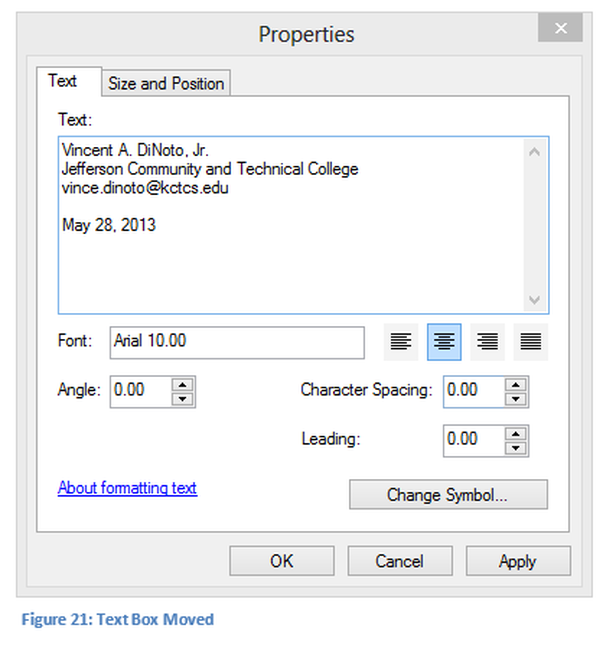
The information should include the name of the map creator, any associates who worked on the map, the organization(s), contact information such as an email address and the date the map was created. In this example, the creation information is placed in the lower right, this is the preferred location but not always possible due to the layout of the map. Additional text boxes can be added to the map as appropriate to convey other information. Place a boarder around the text box to separate it from other map features.
Other Items
Other items that might be added to the map are the logo of the organization(s). Make sure if logos are on the map they are of good resolution and that appropriate permission have been obtain to use them. For multiple logos make sure they are all the same size and do not get in the way with the message the map is trying to explain.
Creative Common and copyright information might also be included. The Creative Common license can be created using a generator at: https://creativecommons.org/choose/. The license for this map might have a format like: Morgan's Raid July 1863 by Vincent A. DiNoto, Jr. is licensed under a Creative Commons Attribution-NonCommercial-ShareAlike 4.0 International License or place the image seen in Figure 22.

