Getting Started
The purpose of this lesson is to join table and shapefile data downloaded from the U.S. Census Bureau in the TIGER filearea. TIGER shape files are geographical areas created by the U.S. Census Bureau. Joining data and a shapefiles is a very important part of geospatial technology.
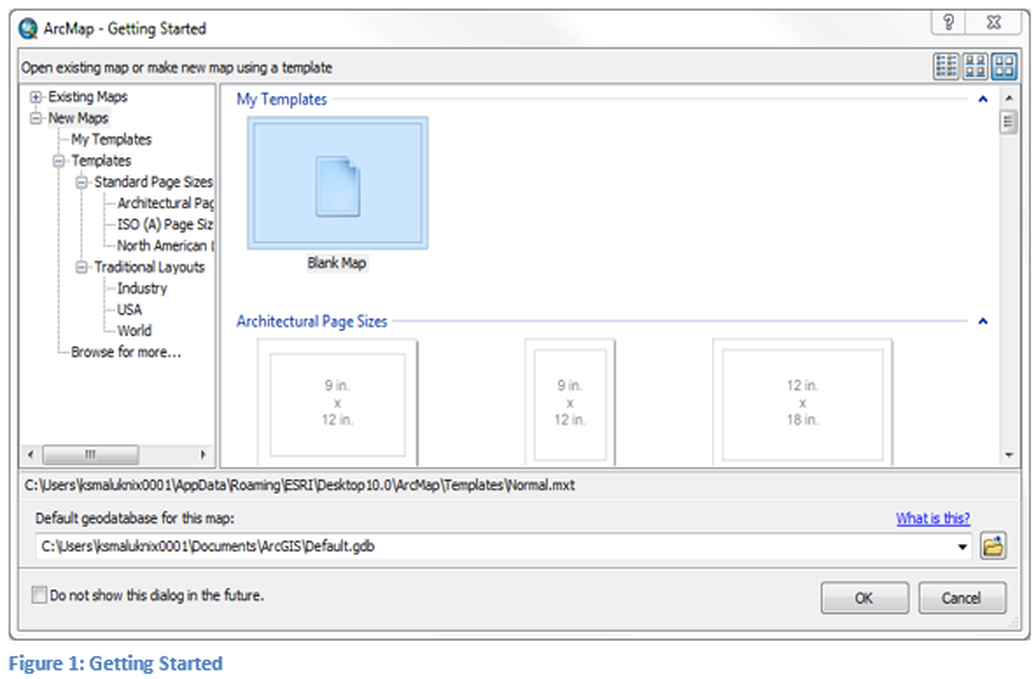
Open Esri ArcMap, begin with a blank map. It is assumed that the user can load the appropriate shapefiles downloaded from the U.S. Census Bureau onto a map. These files are generally in a geodatabase, but could be in a file folder. If the user has problems loading the shapefile refer to the lesson on adding shapefiles. Make sure the shapefile has been decompressed prior to attempting to load it into the mapping software.
Unknown Spatial Reference
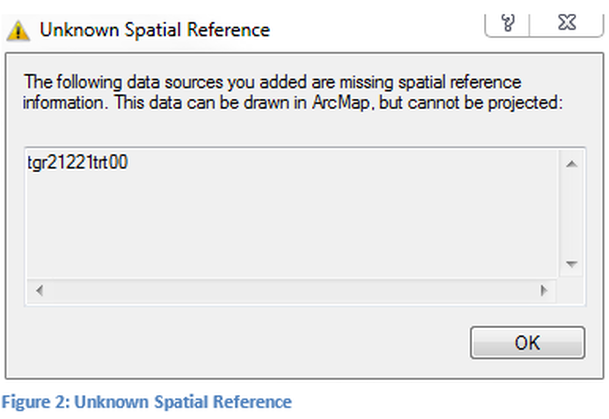
In general shapefiles that are downloaded from the U.S. Census Bureau do not have a projection. The learner may be warned about an unknown spatial reference when loading the shapefile, select OK. The user can project the shapefile, not projecting the shapefile should not alter the concepts of this lesson. See Figure 2.
Initial Viewing of the Shapefile
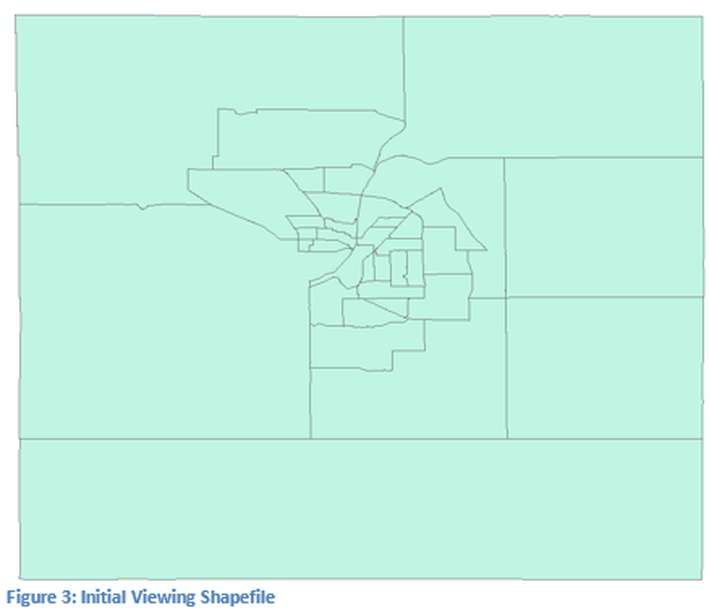
In the example a map of Tippecanoe County, Indiana was downloaded at the census tract level, and loaded onto the map, see Figure 3. The county selected by the learner for this study should be displayed and the map should have a monochromatic color which will vary. The lines shown are the census tract boundaries. Additional shapefile data such as rivers, roads, township boundaries, etc. can be added to the map but are not required to complete this lesson. This shapefile is a polygon, since the lines form a closed area (each census tract is a polygon).
Reviewing the Tabular Data
Before using the census tract tabular data, it should be reviewed. The data set came from the U.S. Census Bureau as a comma delimited file (csv). In some downloads three csv files are created, in this case only two were created in the data download. The file folder was decompressed prior to opening, two different Excel files are shown (the files appear as Excel documents since the authors computer associates csv files with Excel, different computers might not have this association). The green arrow in Figure 4 points to the file to be opened, using
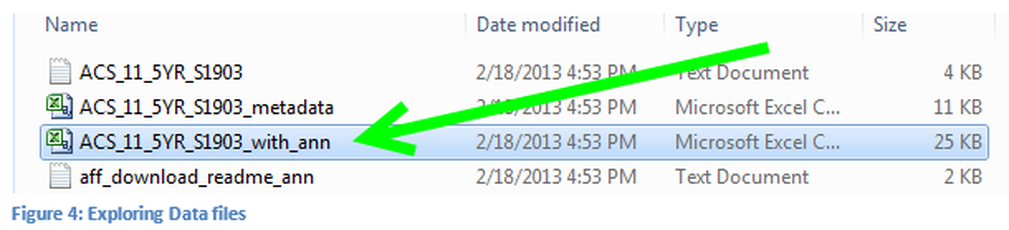
Microsoft Excel, for Tippecanoe County of Indiana. The name of the file refers to the data not the location, so therefore it is important to keep datasets in the appropriate folders, with a name similar to IN_Tippecanoe_S1903_data. If the csv file is not associated with Microsoft Excel the user will need to select Microsoft Excel as the program to open this file type. When the file is opened in Microsoft Excel it appears
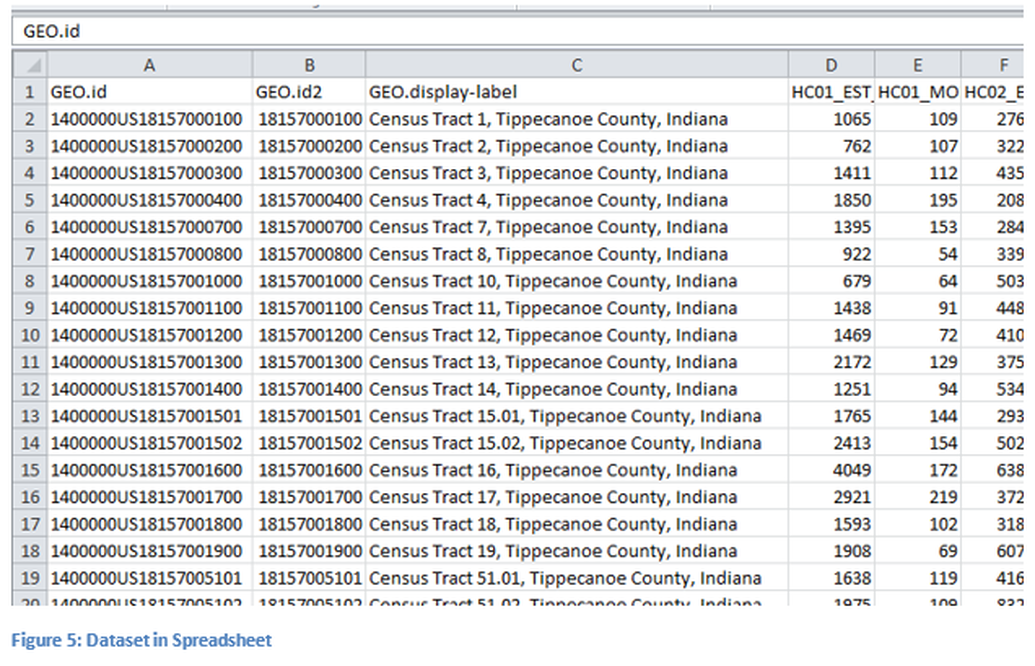
in a spreadsheet format. The columns have been expanded so that the information can be viewed, see Figure 5. The Geo.id2 column has the data which will be used for the join. The values in this field are in numeric format, this is known by an inspection of the data and making sure that it is right justified, if it were left justified the data would have been a text field. This data needs to be in a text format, this can be accomplished by highlighting the column and then right clicking to format the cell as text. There can be only one header row as shown in Figure 5, in general there are two header rows with this data set and the second row must be deleted, this was completed prior to creating the screen image. The names in the first row cannot have spaces or use special characters, note that the spaces were replaced with the underscore symbol. Save the file as a Microsoft Excel spreadsheet to use with Esri ArcMap. It is critical that the spreadsheet is closed prior to using it for mapping.
Alternative
Before proceeding to use the alternative step it is important to determine if there is a format mismatch. If the shapefile and the data file are in the same format, this section may be omitted and continue on to page 12, the tabular join process. Open the attribute table of the shapefile and the csv file in ArcMap, if the common fields are aligned either to the left or right they are of the same file format, if one is aligned to the right and the other to the left then there is a data format mismatch and this alternative section must be used.
Many times just changing the data type in the spreadsheet, even though it was csv file will not change the formatting. Joins cannot occur when there are mismatched formats. In researching the literature there are several different ways discussed to fix this issue, some methods work, while others the author has never been able to make work properly. The basic concept that seems to work every time is to create a new field in the csv file table. Specify that file will be the same field type as the shapefile. The field calculator is used to populate the new field with information from the section that was in the wrong data format. In ArcMap the format type cannot simply be changed.
This alternative procedure is used as the norm at the GeoTech Center. ArcCatalog will be used in this process, but could be completed in ArcMap.
The procedure has been broken into steps.
1. Open ArcCatalog from within ArcMap and locate the Excel csv file.
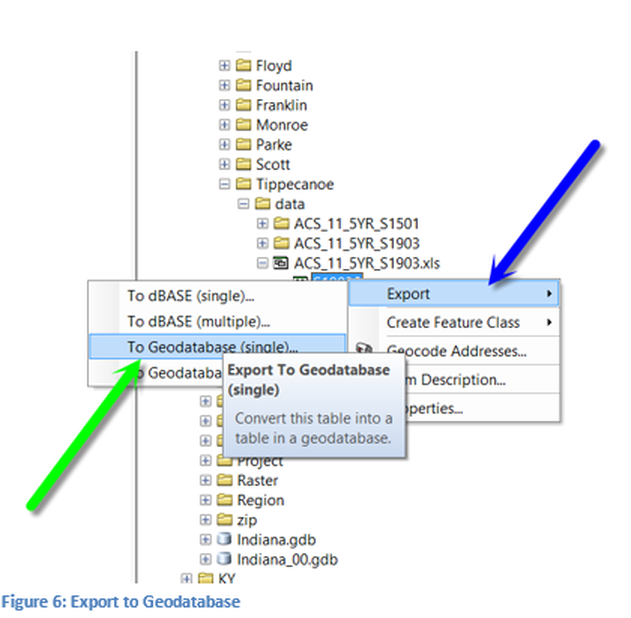
a. Right Click on the Excel file table and select Export, then Select Geodatabase (single), see Figure 6.
Many times just changing the data type in the spreadsheet, even though it was csv file will not change the formatting. Joins cannot occur when there are mismatched formats. In researching the literature there are several different ways discussed to fix this issue, some methods work, while others the author has never been able to make work properly. The basic concept that seems to work every time is to create a new field in the csv file table. Specify that file will be the same field type as the shapefile. The field calculator is used to populate the new field with information from the section that was in the wrong data format. In ArcMap the format type cannot simply be changed.
This alternative procedure is used as the norm at the GeoTech Center. ArcCatalog will be used in this process, but could be completed in ArcMap.
The procedure has been broken into steps.
1. Open ArcCatalog from within ArcMap and locate the Excel csv file.
a. Right Click on the Excel file table and select Export, then Select Geodatabase (single), see Figure 6.
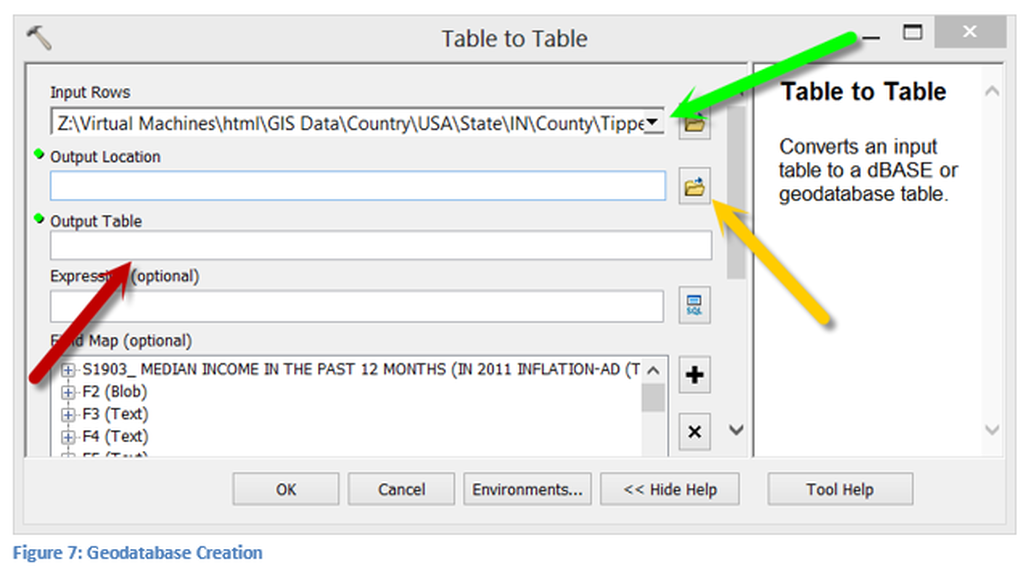
b. Once the Geodatabase is selected a new window will appear. See Figure 7. In the first row, the input table is already selected (green arrow). The output location will be a geodatabase, the default gdb might be an appropriate location since this is a file that will not be used once the tabular join is completed. Use the folder icon to select a location (orange arrow). Select a name for the table, then select OK. Load the table into the map project.
|
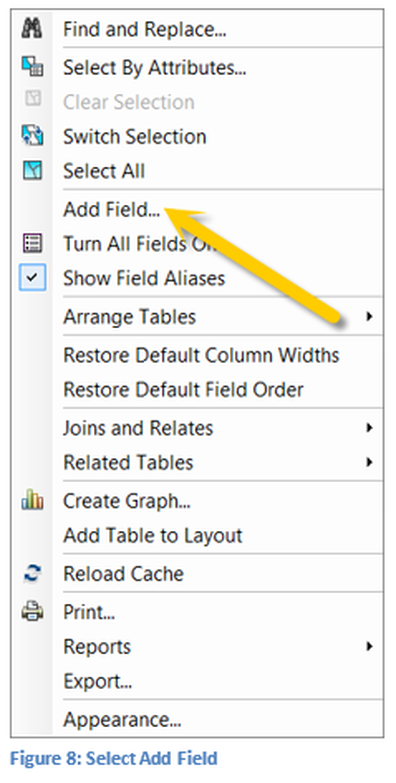
2. Right Click on the table and select Open. On the upper left corner of the attribute table is a selection that opens the menu seen in Figure 8.
a. Select Add Field. b. Next give the field a name as seen in Figure 9 (blue arrow) and make sure it is a text field (orange arrow). It is critical that it is a text field for the process to work. Select an appropriate number of Characters. Remember the field was originally a numeric field. c. The name selected in this example is test. 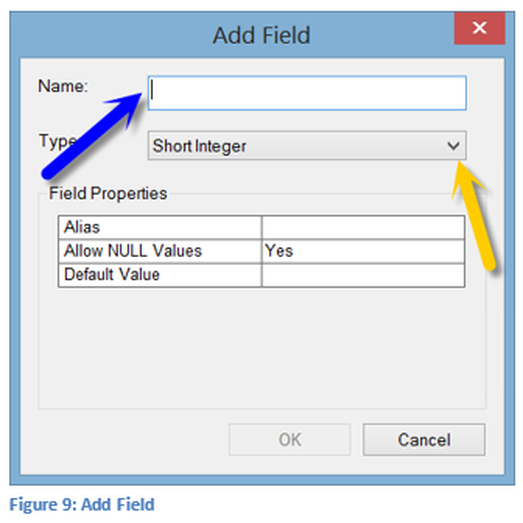
|
|
This process will create a new field in the table. The final process will use of the field calculator tool (there is a technical skills lesson on this tool). The new field (test for our case) is normally added at the end of the attribute table, navigate to this location.
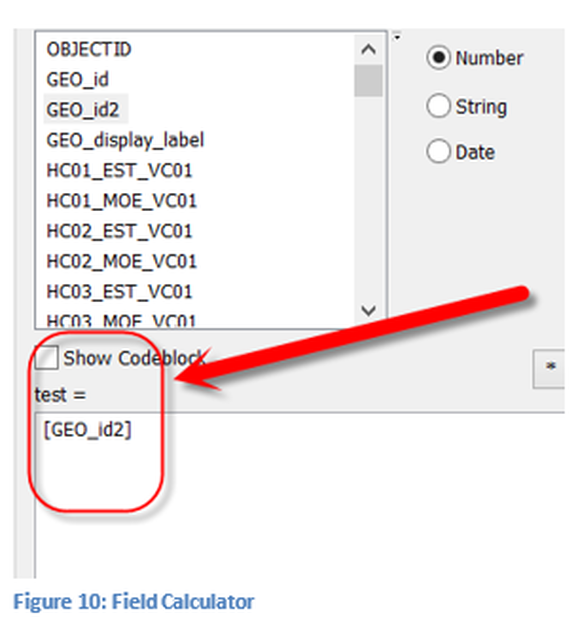
3. Right click on the header of the new field (for this example, named test) and select field calculator. A warning message will be displayed, click yes to continue. Note: in the red box the selected operation is displayed as seen in Figure 10, the box shows that test is to equal GEO_id2. This field was selected for the calculator by double clicking on its name above. This operation is a simple copying of the information in Geo_id2 into the new text field (test). This operation can only be done once since this is a database and not a spreadsheet. The specified formatting of the new field will change from numeric to text.
4. Once this process is completed continue to the actual tabular joining operation in the next section.
This operation is only required if setting the field as a text field in Excel did not produce the desired results

